
As a passionate golfer with limited time and unpredictable weather, some at-home simulation sounds highly appealing. But those living spaces prove less than ideal for smoothly swinging driver centimetres from plaster walls and low ceilings. However, properly constructing a simulator enclosure within your basement transforms previously unusable spaces into personal golf paradises.
-
Structural planning
Basement frameworks vary drastically, so identifying fixed pipes, electrical lines, support columns, and other obstacles takes priority. Auditing insulation, climate control, flooring materials, and overall room dimensions also play key roles in influencing enclosure plans. Corner locations offer natural backdrops to anchor structures against using at least one existing wall. Freestanding modular designs stand alone as separate rooms but require extensive ceiling netting to catch errant drives. Multi-pieces allow reconfiguring layouts to adapt spaces. Either way, maximum dimensions ensure ample swing clearance without drives pinging rafters.
-
Framework fabrication
Standard bay golf simulator enclosures combine durable composite or aluminium poles with printed vinyl graphics or netting panels. DIY options utilize affordable PVC pipe frameworks with surface wrap layers. Screen support poles are mounted to bases via clamps or threaded connectors to fine-tune angles as needed. Remember, ceilings require extra netting layers beyond side barriers to absorb off-line drives. Dedicated enclosure companies supply kits with everything from framework to turf and netting tailored to room specs.
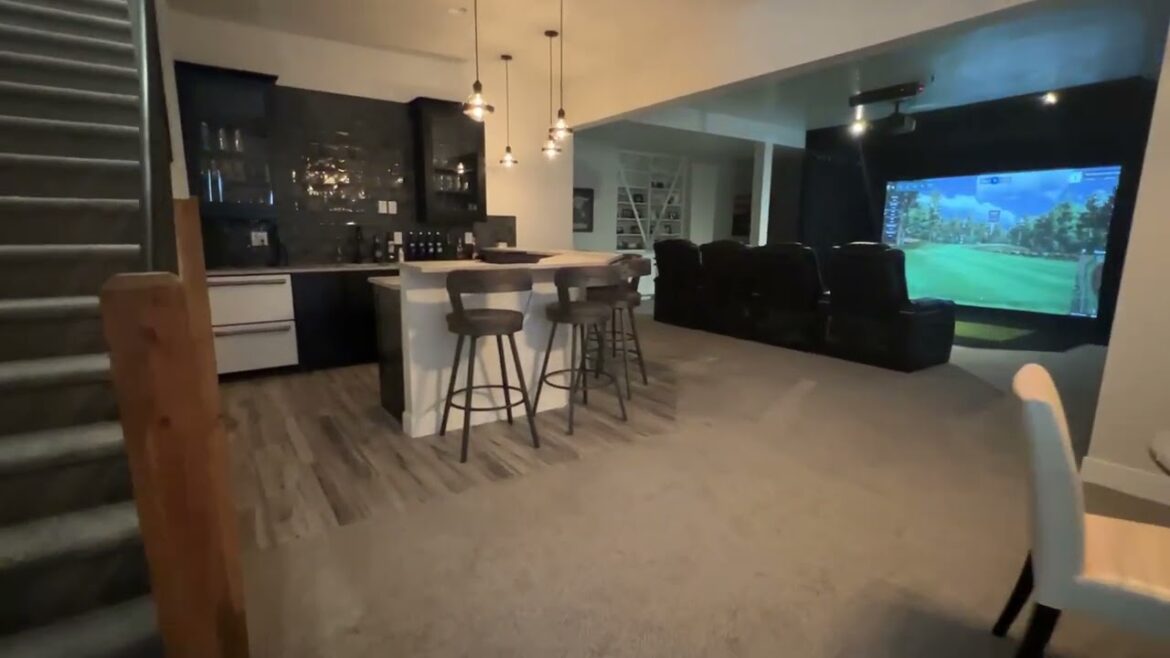
Dealing in internal components
With the exterior enclosure frame erected, dial in interior performance elements:
- Impact Screens – Position high-resolution projector screens optimally between 6 to 8 feet from the hitting area so golfers stand safely clear of backswings. Angle centrally or offset screens to maximize hitting width.
- Ceiling Baffles – Suspend netting or acoustic foam above the swing zone to dampen ball strike clatter while containing sky balls. Leave at least one foot of clearance for driver arcs.
- Ball Containment – Further layer side and rear walls using heavy-duty netting capable of stopping speeding drives without tears or protrusions sending balls ricocheting.
- Mat surfaces – Forget hard basement floors. Add genuine hitting turf mats as substrates for authentic interaction with compressed foam bases that mimic giving lies. Slope and break line adjustments further enhance realism.
- Power needs – Safely route electrical cords to power launch monitors, projectors, lighting, and climate systems. Integrate electrical within framework builds. Internet connectivity enables simulator software updates, streaming, and remote performance tracking.
Protection & accessibility
Completed enclosures not only enable immersive simulation but also protect valuable monitor hardware from errant swings and debris. Lockable bay doors secure gear investment when unattended. Soundproofing prevents HVAC rumbling or household noises from interrupting golf concentration. The dedicated separate structure confines mess, allowing quick access to hit without extensive teardown. Just open the enclosure and step right onto the tee with clubs at the ready for instant stress relief.
Maximize Investment Value
The basements arguably benefit most from proper golf simulator enclosures. Transforming dark storage rooms into dazzling golf unlocks otherwise untapped potential. Purpose-built structures handle containment and protection that unfinished open ceilings and walls cannot. The basement’s secluded privacy also avoids household disruptions that arise using living room setups. Get immersed fully in pressure putts without distractions. Construct a showpiece man cave-dividing off a soundproof section just for the links.